
Introducing Map Layers
Organize your map data in two dimensions We introduce Map Layers as a foundational new feature for organizing your map data. […]
Organize your map data in two dimensions We introduce Map Layers as a foundational new feature for organizing your map data. […]
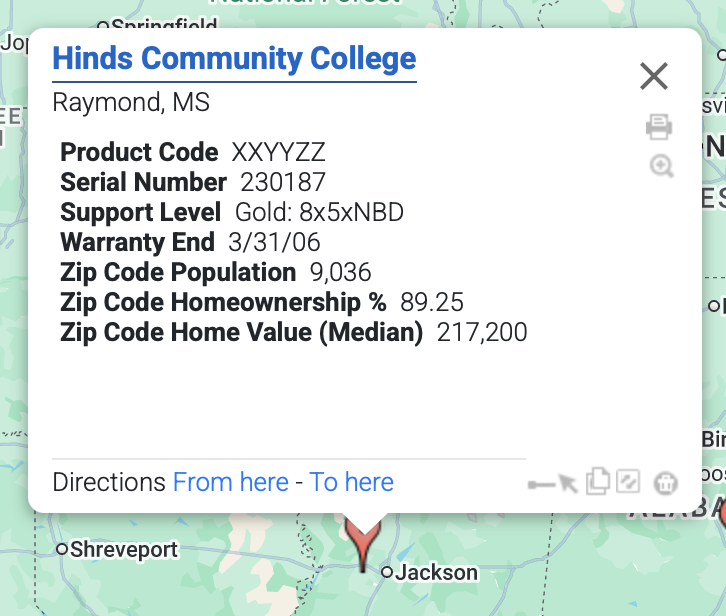
Have you ever wanted to see US Census demographic data directly on your map? With ZeeMaps, you can now add official US
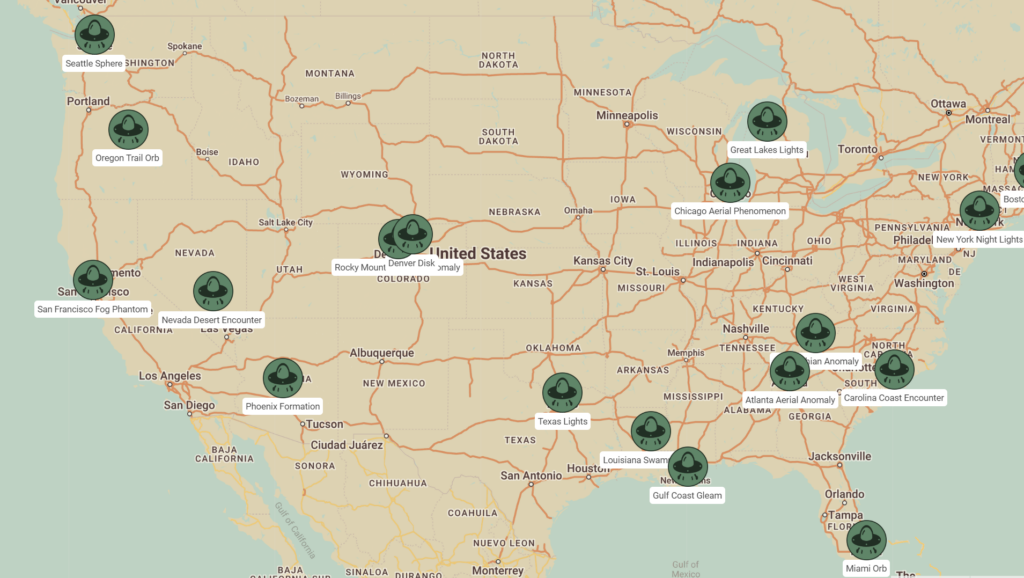
UFO sightings span across America, and with ZeeMaps’ latest feature, you now have the power to depict these enigmatic occurrences with unprecedented clarity.
The days of being constrained to three-character map pin labels are behind us. Let’s embark on a journey to craft a detailed UFO sightings map featuring extended pin labels.
ZeeMaps allows you to create interactive maps from location data stored in Microsoft’s OneDrive spreadsheets. ZeeMaps can periodically update the map as
Trip Planner Overview ZeeMaps can used as a trip planner to plan your routes visiting multiple points marked on your
When mapping locations from a spreadsheet on a Google Drive, you can set up auto-update such that changes to your