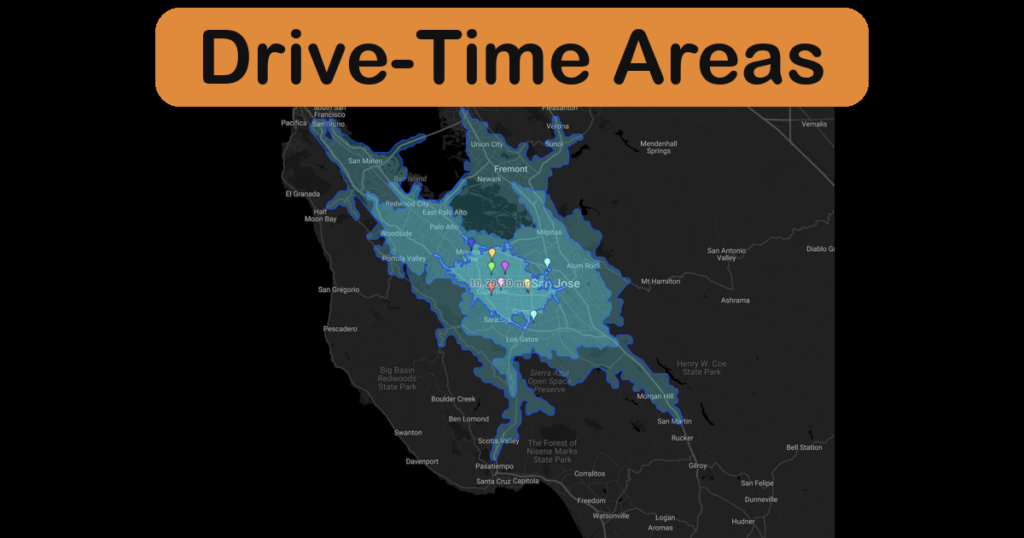
How Far Is 15 Minutes? Introducing Drive-Time Areas
Create an isochrone map in ZeeMaps: highlight drive-time areas around one address, every pin on your map, or a whole spreadsheet of locations.
Create an isochrone map in ZeeMaps: highlight drive-time areas around one address, every pin on your map, or a whole spreadsheet of locations.
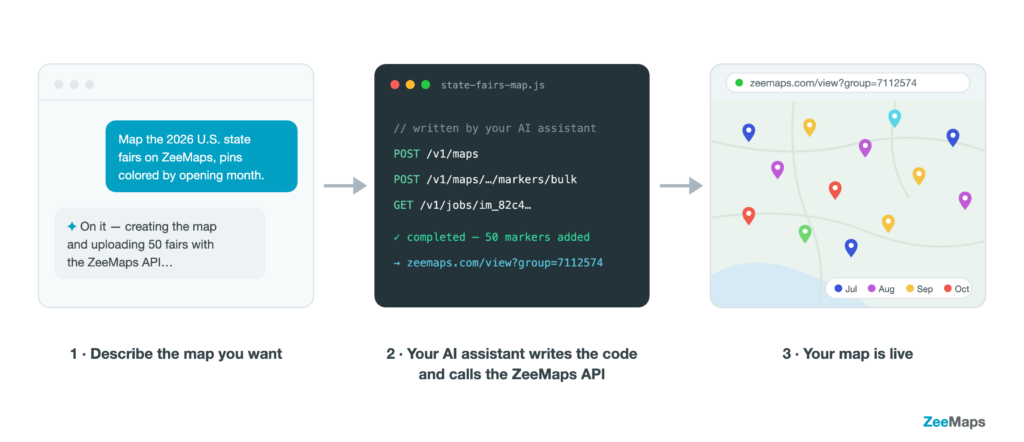
The new ZeeMaps REST API lets your software — or your AI assistant — create maps, add and update markers, search locations, and render map images automatically.
If you are a paid user, ZeeMaps allows you to create a traffic map with real-time overlay of Google traffic
ZeeMaps allows you to create interactive maps from location data stored in Microsoft’s OneDrive spreadsheets. ZeeMaps can periodically update the map as
When you set up an Enterprise account with ZeeMaps, you can add additional users to the account at relatively low
Paid subscribers can enable street view on their maps. Use the Map -> Settings menu to get to the Map