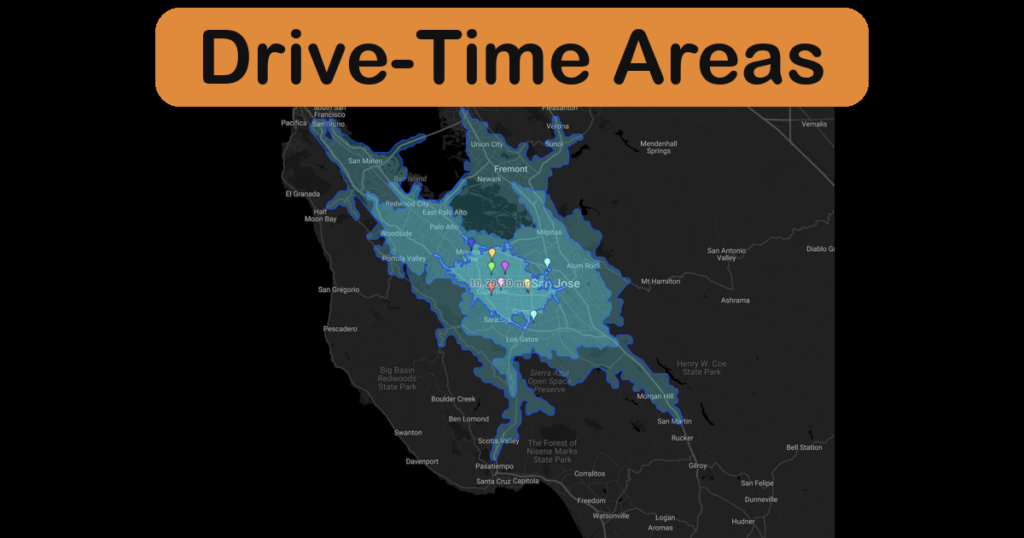
How Far Is 15 Minutes? Introducing Drive-Time Areas
Create an isochrone map in ZeeMaps: highlight drive-time areas around one address, every pin on your map, or a whole spreadsheet of locations.
Create an isochrone map in ZeeMaps: highlight drive-time areas around one address, every pin on your map, or a whole spreadsheet of locations.
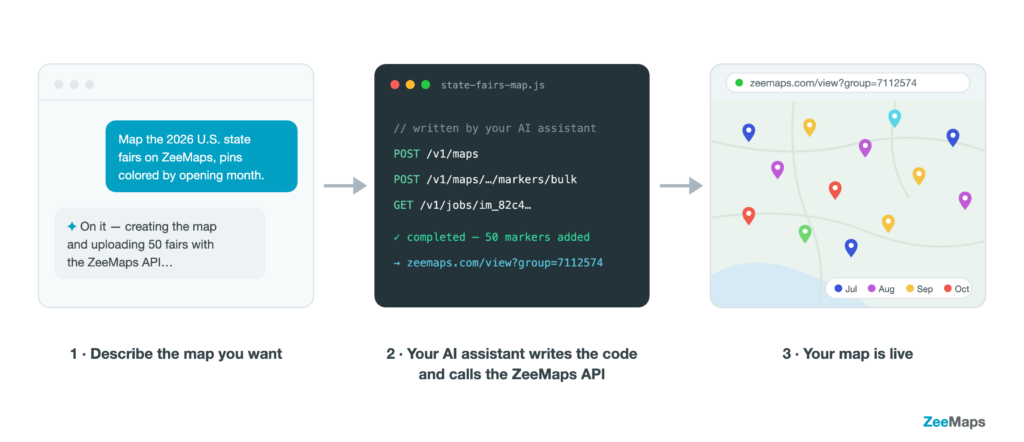
The new ZeeMaps REST API lets your software — or your AI assistant — create maps, add and update markers, search locations, and render map images automatically.
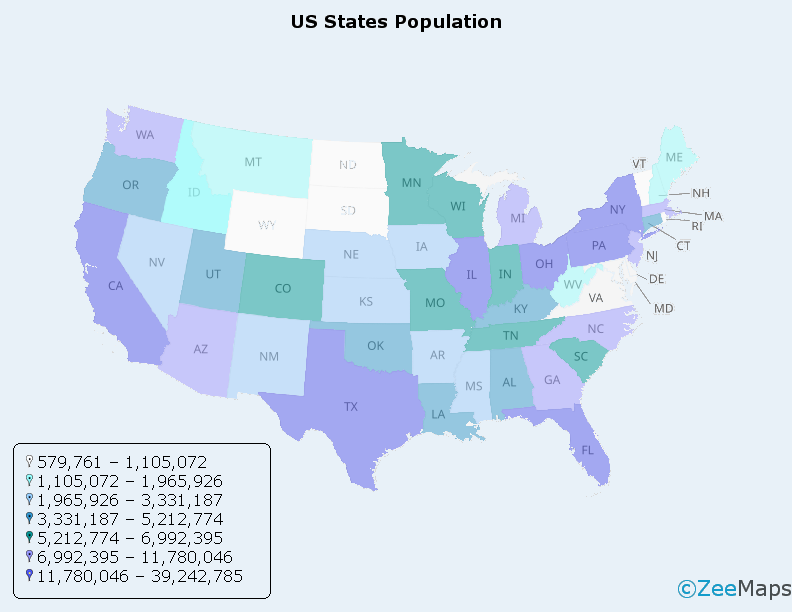
A spreadsheet full of numbers rarely tells a story. A color map by data values tells it instantly. With ZeeMaps’

Organize your map data in two dimensions We introduce Map Layers as a foundational new feature for organizing your map data.
ZeeMaps supports highlighting regions on maps, making it easy to visualize sales territories, service areas, or marketing reach. Highlighted areas are
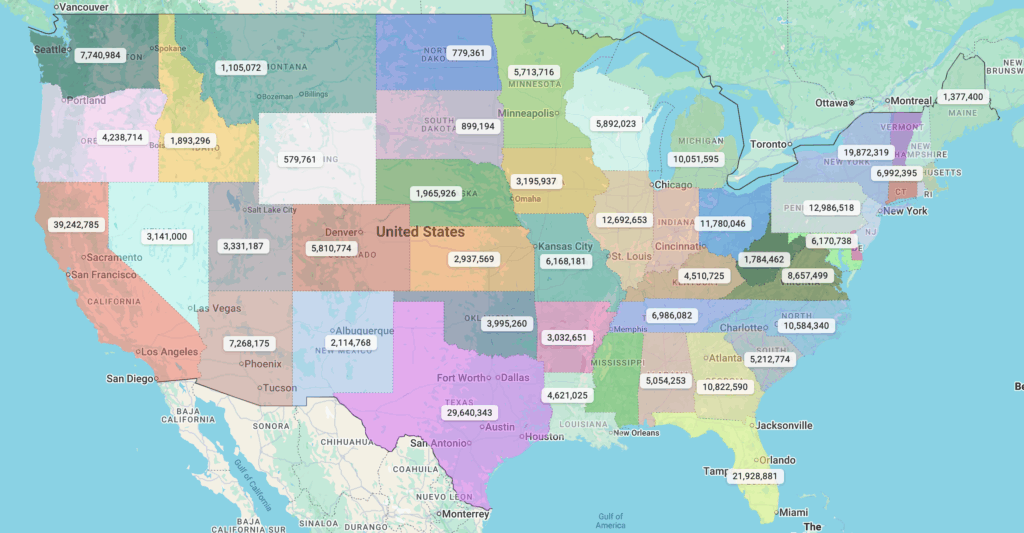
ZeeMaps allows map labeled alongside map pins. Labels show either on the pin itself, or below the pin. Pins with