Add US Census Demographics to Your Maps
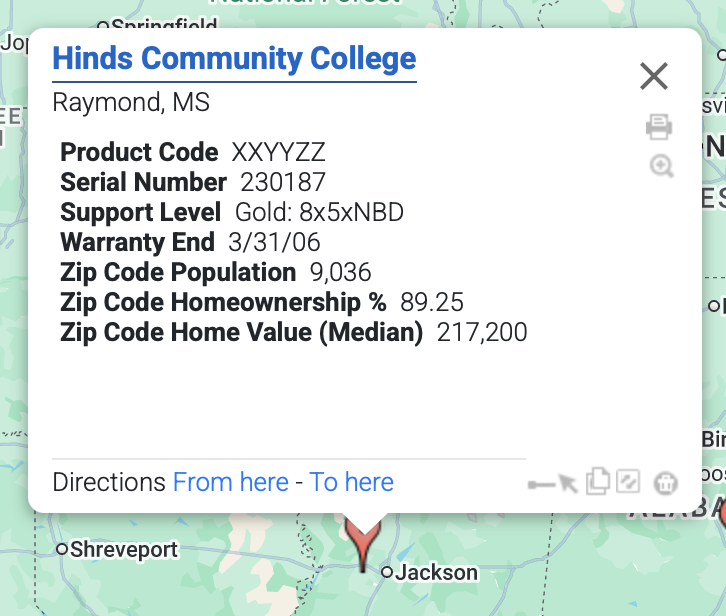
Have you ever wanted to see US Census demographic data directly on your map? With ZeeMaps, you can now add official US […]
Have you ever wanted to see US Census demographic data directly on your map? With ZeeMaps, you can now add official US […]

ZeeMaps online map sharing options range from secure personalized sharing to publishing a map on a website. This article describes
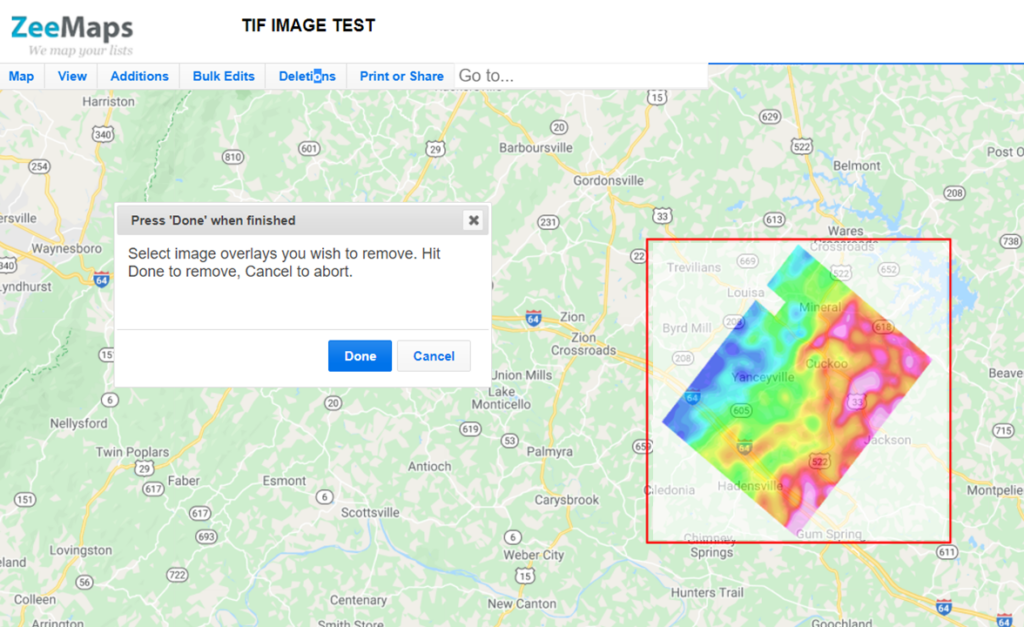
You can now add image overlays on your maps for a beautiful visualization with ZeeMaps.
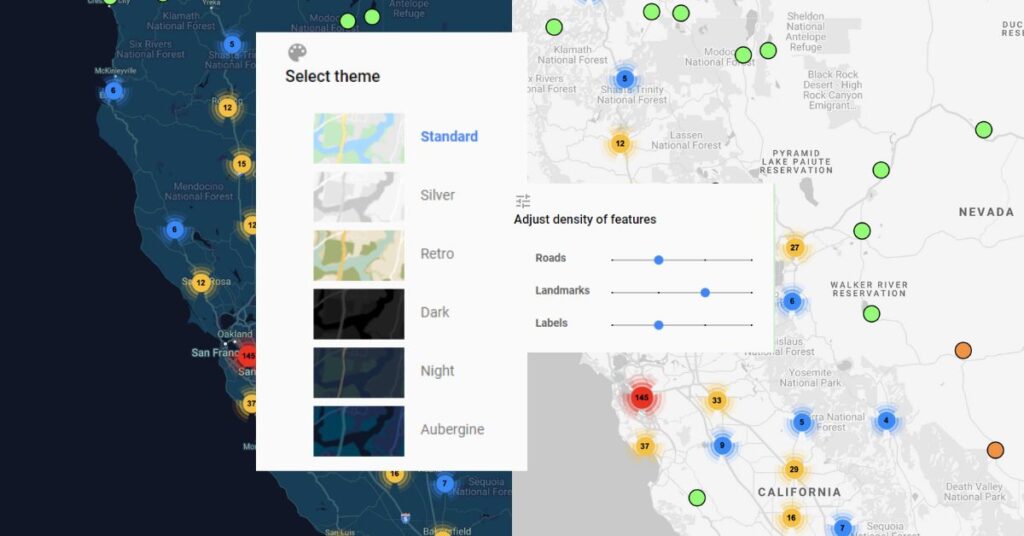
A map’s style defines the colors used to show different features on a map. You can change your map type in ZeeMaps.
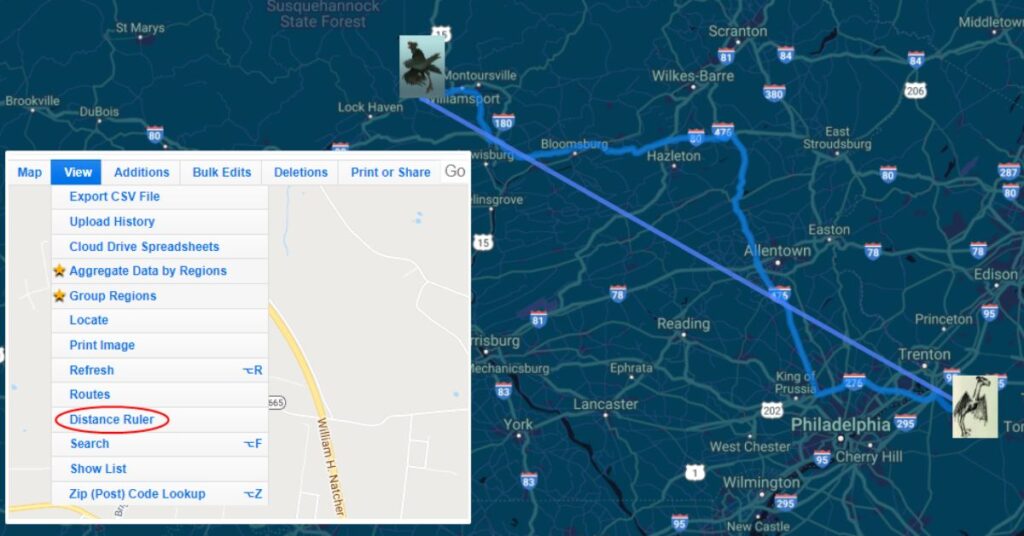
You can measure distance between any two points on a map using ZeeMaps’ “Distance Ruler” or Google Maps routing.
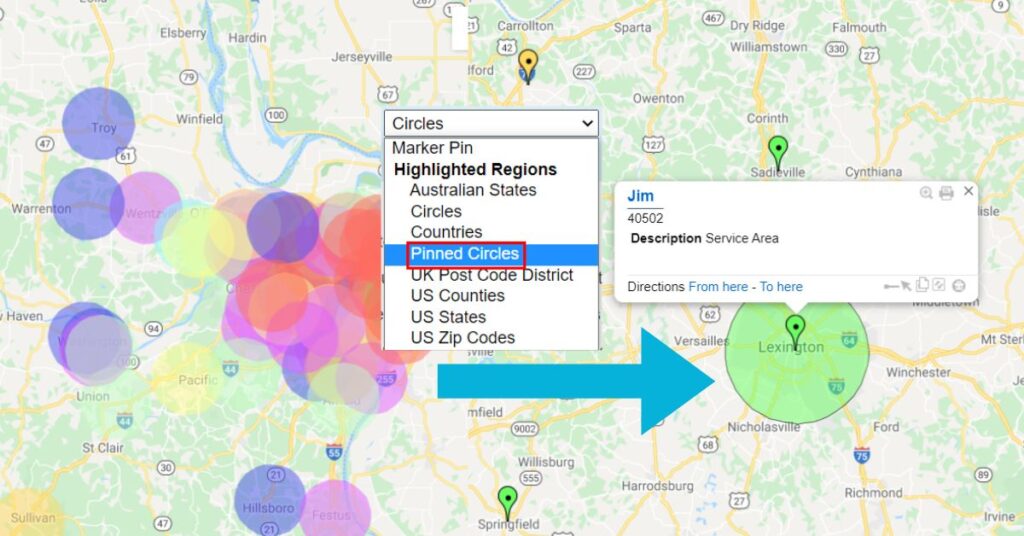
Adding pinned circles to a map allows for increased capabilities and visibility when displaying radius, in cases such as a sales territory.