We’ve added the capability to highlight states, cities in map of Australia, and states, counties, cities in map of France. Since France does not use states, counties and cities, we’ve approximated them with Regions, Departments, and Communes, respectively.
For example, to highlight the state of Queensland in map of Australia, create a map and then click on the menu item Additions -> Highlight Regions -> States. In the resulting dialog, select Australia as the country and then Queensland as the state. Customize your boundary and fill color and hit Submit.

This should add highlight Queensland in the following map of Australia:
Here’s the same map with Paris Department (county) highlighted:
Category: display
Re-Color Map Markers
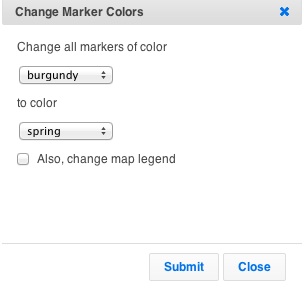
To change the color of a set of markers from one color to another, use the Bulk Edits -> Re-color Markers menu item. You must be a paid subscriber to use this function.

This will bring up a small dialog, that asks you to pick the original color and the new color. At this time, you can also change the map legend from the old color to the new color, by checking the box for “Also, change map legend”.
Displace Markers to reduce clutter
Sometimes map markers (pins) can get cluttered on the map if they are too close to each other. Other times markers can overlap, causing just the top one to be visible.
We’ve added the ability to “Displace Markers”, that allows you to un-clutter close or overlapping markers.
To displace a marker, click on the marker to show the information bubble. Then, click on the first icon to the right bottom of the information bubble. (You must be admin, or have added the marker, to see the icons on the right bottom of the information bubble.)

A small window with the buttons “Done” and “Cancel” will appear, and you’ll be able to drag-and-drop the marker to a displaced location. A thin black pointer will point to the original location of the marker, so you know the actual geo-position.
After dragging-and-dropping the marker to a displaced location, if you click on the “Done” button, the marker will be displaced both in the interactive version of the map, and the static images. If you click on the “Cancel” button, the marker will be re-positioned at its original location.
In the above map, we had two overlapping markers. We displaced the top one, to get the following map:

Remove local business listings from maps
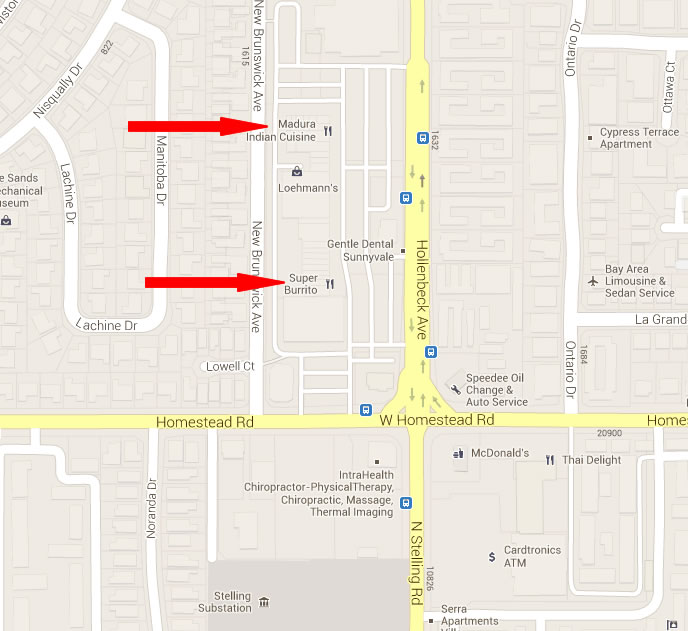
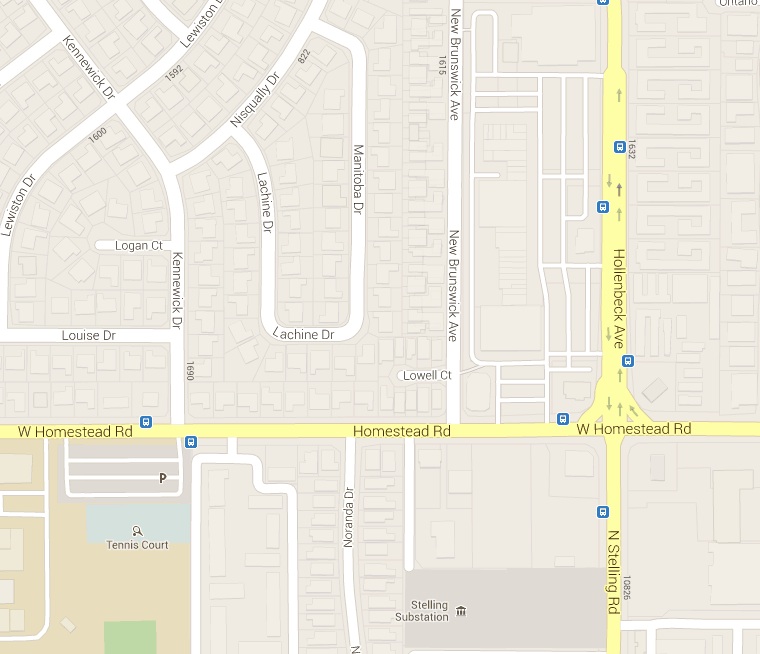
Google Maps often display local business listings. When you are searching for local businesses, this can be a useful feature. At other times, however, the business pointers can clutter the map, or worst show competitor’s business on your map!
For example, in the following map of a block around our offices, several businesses are listed, such as one Indian and one Mexican restaurant. If you are a paid subscriber, ZeeMaps will allow you to remove these business listings from your map.
Use the Map -> Settings menu to get the Map Settings page, and then select the Map Display tab to change the map display settings.

Within that, check the box that says “Remove local business listings from map”:

Once you have set this checkbox, now if you go back to the map, the local businesses will no longer show:
The business listings will not show on your map as long as you have signed-up for one of our paid plans.
Enable Scroll Wheel Zoom and MouseOver for Information Bubble
We have added a couple of new features to ZeeMaps:
- Enable scroll-wheel zoom, and
- Mouse-over to open information bubble for markers.
These features are not enabled by default. To enable them, use the Settings → Display or the Settings → Markers menu items.

