You can now add image overlays on your maps with ZeeMaps – think of the possibilities of world map pictures! This can be helpful, e.g., if you want to display a detailed campus map. Or, perhaps you have another image you would like to see referenced in your map. Follow the instructions below to get started.
How to Add Image Overlays (World Map Pictures)
To add an image overlay, use the Additions -> Add Image Overlay menu item on your map.

Once you click on the menu item, a dialog on the map will give you four steps to follow to add your image overlay.
First, drag-and-drop the image that you want to add to the map. The picture you place on your map can be of anything! In the image below, we placed a mandala as an example.
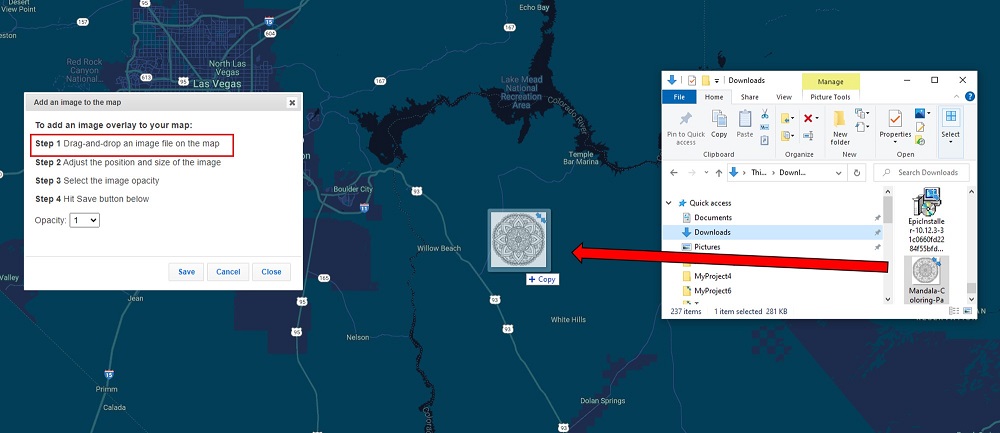
Next, for Step 2 you will need to adjust the size and position of the image. You can re-position the image manually by using the handles on the rectangular boundary on the image. For Step 3 you will select an opacity. The smaller in number the opacity, the more transparent your image becomes.

The final Step 4 is to simply click Save.
Using a GeoTiff or Georeferened Image
If your image is a GeoTiff image, ZeeMaps will determine the coordinates of your image automatically and correctly position the image or picture on your world map. For a good overview of the various formats for storing geographical information, please see The Ultimate List of GIS Formats and Geospatial File Extensions.

Otherwise, you will have to manually adjust the size and position of your image, as shown in Step 2 above. Please note, images must be less than 10MB. To learn more about GeoTiff images, check out this site: https://www.gislounge.com/what-is-a-geotiff/
After you have added your GeoTiff, try adjusting the opacity as shown above.
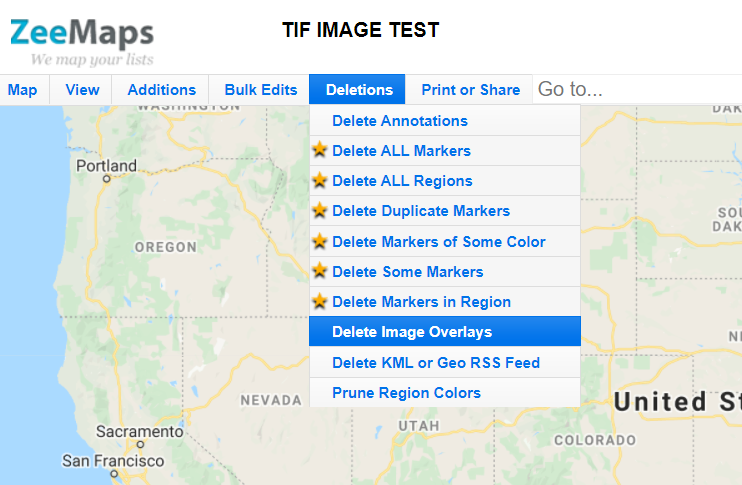
Delete Image Overlay
Should you want to delete an image overlay, it is straightforward to do. From your map, navigate to the Deletions tab in the top menu. Then, click Delete Image Overlays. A dialog will give instructions on what to do next to delete the image or picture from your world map.
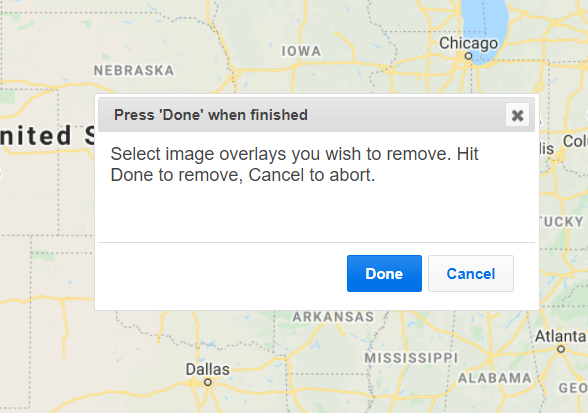
You will select the image overlays you wish to remove. Then, a red box will appear around the image as shown below.

To remove, hit ‘Done.’ However, if you wish to abort, simply select ‘Cancel’.
Create Your Own World Map Picture
2: Share on social
3: Tag ZeeMaps #ZeeMaps #WeMapYourLists
We cannot wait to see what you create!