Each marker—whether it’s a pin or a highlighted region—has associated data such as name, location, and more.
This data is stored in fields for that pin or region.
While all pins have custom fields, highlighted regions have custom fields only when you upload data from a spreadsheet, e.g., to highlight US Zip Code boundaries.
When you create a new map, ZeeMaps automatically creates four default fields:
- Description
- Phone
- Website
You can add or change the fields for a map in two ways:
- Using the Map menu: Go to Map → Marker Fields.
- Uploading a spreadsheet: Any extra columns (beyond those used for name, location, or color) will automatically become new fields.
1. Editing Fields Using the Map Menu
When you choose Map → Marker Fields, you’ll see the Marker Fields dialog:
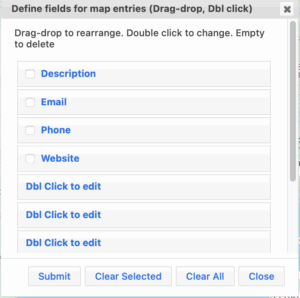
- Rename a field – Double-click its name (e.g., “Description”) and type the new name.
- Add a new field – Double-click any entry labeled “Dbl Click to edit” and type the new field name.
- Rearrange fields – Drag and drop fields into your preferred order.
- Delete a field – Check the box next to the field and hit the Clear Selected button
- Click Submit to save changes.
2. Adding Fields by Uploading a Spreadsheet
When you upload a spreadsheet:
- Columns not used for name, location, or marker color will be added as custom fields.
- The values in those columns will be stored with each corresponding marker.
Example spreadsheet (placeholder data):
| Name | Address | Color | Support Level | Customer Status |
|---|---|---|---|---|
| ABC Corp | 1212 Fun Street, Los Angeles | Blue | Gold | Active |
| XYZ Inc | 2345 Noisy Street, New York | Red | Silver | Inactive |
Why Use Custom Fields?
Custom fields make it easy to search your map for specific criteria. For example:
Show all Gold customers in California who are within 50 miles of my office.